BLOG
How to Implement Firmware CI/CD with Docker
At Very, we’ve been productive using the Nerves framework when building hub devices for our IoT projects. What about “spoke” devices, like sensors or beacons? Often the right choice in the world of Things is tried-and-true C. While the language is as stable and useful as ever, there are some rough edges when viewed from the world of Agile web development. In this post I’ll show how we developed a toolchain for developing and testing firmware using C, Python, and Docker to achieve repeatable, testable builds for one such device.
Recently, we had the chance to build an asset tracking system using the nRF52832 as a Bluetooth beacon. The nRF52832 is a self-described mid-range SoC that is BTLE-ready out-of-the-box. If I’m hacking on one by myself, I can reach for a tool like Segger, run Build, flash my chip, and I’m off to the races. However, when I work with a team of developers, or when I bring someone new onto a project this method falls apart. Let’s explore why this is, and some ways we can make our lives easier.
Project Workflow Choices
IoT is connecting two technologies, web and embedded. When picking the process that is right for your firmware builds and tests, you can have one of the following.
- No consistent builds, no standards, each developer builds and tests their own component in isolation
- A process, but one that might be hard to repeat
- Weapons-grade repeatability with Docker
In my experience, the latter option yields the greatest agility across the project as a whole. If I choose option one I’m effectively hamstringing my team and pushing our bus factor lower than it needs to be. If we choose option two, each of us will need to install system dependencies for our entire toolchain. This works, but places a high cost on bootstrapping new developers to the project. It also introduces the risk of non-repeatable builds as developers may join the project at different times and inadvertently install different dependencies!
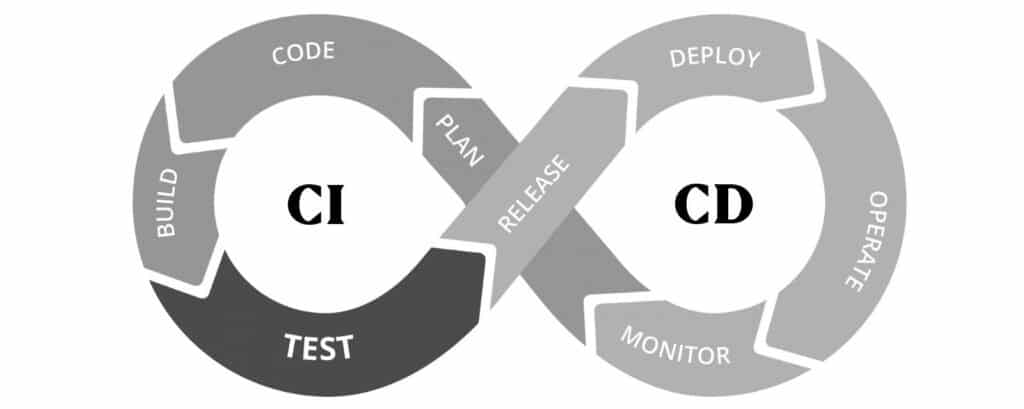
By choosing option three, I empower every developer to have visibility into the whole stack, not just their silo. The way I prefer to work is repeatable setup-once build environments that can run without my system needing specific tools or dependencies. I want versions pinned, and the build process to be hands-off. I want my whole team to experiment and iterate. One way to achieve this is to bundle up all the dependencies into a Docker container to build, test, and deploy. If you aren’t familiar with Docker or containers, the quickest way to start thinking about them from the Docker website is
A Docker container image is a lightweight, standalone, executable package of software that includes everything needed to run an application: code, runtime, system tools, system libraries and settings.
In the world of web, Docker is one of the best ways to get isolated, repeatable, environments. What would applying this technology to the world of embedded look like? Well, here is the Dockerfile we wound up developing for our asset tracking project.
FROM python:2.7-stretch

ENV SDK_ROOT=/opt/nordic/nRF5_SDK_15.2.0_9412b96
ENV DOCKER_JUMPER_EXAMPLES=1

RUN apt-get update && apt-get
install -y gcc-arm-none-eabi=15:5.4.1+svn241155-1 screen=4.5.0-6
RUN pip install 'jumper==0.3.81'
RUN mkdir -p /opt/nordic
  && wget https://www.nordicsemi.com/-/media/Software-and-other- downloads/SDKs/nRF5/Binaries/nRF5SDK15209412b96.zip -O nordic_sdk.zip
  && unzip nordic_sdk.zip -d /opt/nordic/
  && rm nordic_sdk.zip
  && wget https://www.nordicsemi.com/-/media/Software-and-other-downloads/Desktop-software/nRF-command-line-tools/sw/Versions-10-x-x/nRFCommandLineTools1011Linuxamd64tar.gz -O nordic-cli.tar
  && mkdir -p /opt/nordic/cli && tar -xf nordic-cli.tar -C /opt/nordic/cli && tar -xf /opt/nordic/cli/nRF-Command-Line-Tools_10_1_1_Linux-amd64.tar.gz -C /opt/nordic/cli
  && rm nordic-cli.tar

RUN echo "GNU_INSTALL_ROOT ?= /usr/bin/ n
GNU_VERSION ?= 6.3.1 n
GNU_PREFIX ?= arm-none-eabi" > $SDK_ROOT/components/toolchain/gcc/Makefile.posix
ENV PATH="/opt/nordic/cli/mergehex:${PATH}"
ENV PATH="/opt/nordic/cli/nrfjprog:${PATH}"

COPY .jumper/config.json /root/.jumper/config.json
COPY Makefile.common $SDK_ROOT/components/toolchain/gcc/Makefile.common
COPY Makefile.posix $SDK_ROOT/components/toolchain/gcc/Makefile.posix ENTRYPOINT [ "/bin/bash" ]
Building
The first line tells us that we will be building off of an official image, python:2.7-stretch. What this means is that we are running a debian based container that will have python 2.7 included. From here we can start defining, downloading, and configuring the system dependencies. We start by getting screen and gcc. Then we use pip to grab a tool useful for testing, jumper, which we’ll cover later.
This docker image can be used to build firmware using the Nordic CLI tools, jfprog and hexmerge. Also included in the Nordic SDK are Makefiles that provide a really clean interface for flashing the firmware and flashing the soft device. We only made minor tweaks to the defaults to get this container ready for action. A small note about the download URL. More than once I’ve seen it change, breaking the image build. If the URL has changed by the time you read this, update to the correct url and check if things are where you expect them to be – use something like Artifactory for more serious endeavors.
Using this image obviates each developer from having to install and configure a development environment. Using Docker also has the benefit of reproducible builds, since the dependencies are baked into the image. Further, we can also use this image in our CI environments.
Testing
The image we built above could have been built with any number of base images, so why choose the Python 2.7 Stretch base? Testing, of course! You likely noticed pip install jumper and baking in a .jumper/config.json. Even though I begrudgingly use legacy Python, we’re doing so to leverage a powerful testing tool, the Jumper Framework.
Once we have our firmware loaded onto a virtual device we can run unittest tests and make assertions on the behavior of our program without injecting testing libraries into the C codebase. Not only are tests easy to add this way, we can be confident that the behavior here matches our devices. In the test cases below, we could, for example, run the emulator for twenty seconds and then make the following assertions.
def test_pins(self):     c = Counter(self.pin_events)          self.assertTrue(c[(16, 0)] == 1)  # One set low event
     self.assertTrue(c[(16, 1)] == 1)  # One set high event

def test_interrupts(self):
     c = Counter(self.interrupt_events)

     self.assertTrue(c[u"RNG"] > 100)
     self.assertTrue(c[u"Svcall"] == 12)
     self.assertTrue(c[u"SWI0_EGU0"] == 3)
     self.assertTrue(c[u"SAADC"] == 2)
     self.assertTrue(c[u"MWU"] == 1)
     self.assertTrue(c[u"RTC1"] == 1)
     self.assertTrue(c[u"POWER_CLOCK"] == 1)

     assert sorted(c.keys()) == sorted([
        u"RNG",
        u"Svcall",
        u"SWI0_EGU0",
        u"SAADC",
        u"MWU",
        u"RTC1",
        u"POWER_CLOCK",
     ])
Release
Now that we’ve got build and tests in reproducible environments, releasing is a matter of creating a release out of the merged hexfile from our build step. Leveraging CircleCI, we can run our build, test it with our Python tests, and use a tool like ghr to tag-and-release the firmware.
And We’re Off!
In some cases, there isn’t an easy way to emulate a device, or the dependencies aren’t easily bundled. Jumper is great, but far from comprehensive in the images they offer. Your device may require more complex interactions to produce interesting states to test. As in all things in life, this approach might spend more time than it saves, and depends on the specifics of your project. I will attest that in the cases where it works, you’ll be confidently shipping your firmware in no time. If your team is working on an IoT project, I hope you’ll consider containers as a viable approach for building, testing, and releasing.


