BLOG
Raspberry Pi and Python for IoT

The Internet of Things (IoT) is here to stay, but getting started can seem intimidating. Inspired by the magical checkout process at my local library, I began the journey of building my own IoT book lending application. Along the way, I discovered that Python was consistently able to make the impossible seem approachable.
My Raspberry Pi Project
If you’re here surfing this article, which has a title that talks about Raspberry Pi and Python and IoT and books, I’m going to assume a few things about you:
- You like libraries (both Python and the kinds that have books).
- You probably have a Raspberry Pi hanging around that you’d like to do something with.
So now, I’ll share a few things about me. First off, I also like libraries (both Python and the kinds that have books).
I’m from Grand Rapids, Michigan, and one of my favorite buildings in downtown Grand Rapids is the public library. It’s this beautiful, ornate, old-looking building, but there’s also a really modern cylindrical aspect to it. When you walk in, it’s marble floors and wooden staircases, paired with all of these cool modern amenities.
I recently went to the library to check out some books, and was really impressed by the checkout process:
You take all of your books, you scan yourself in with your ID card, and then you set your books down on a pad that says (warning: high-tech speak ahead), “Boop-boop-boop-boop. Did you want to borrow these four books?” You say, “Yes, I did.” And then you’re on your way. You get email updates about when your books are due and when you should bring them back.
I wanted to know, What went into making that? I started looking at the back of all of the books that I had borrowed, and they all had these stickers on them. I quickly recognized them as RFID stickers.
I realized that I had an RFID reader around from a different project, something I was working on at Very, and decided to test some things out for myself. I personally have a lot of books that I like to lend out to my friends and family, and thought it would be interesting to create an IoT book lending app.
What fascinated me most as I went through this project was that, almost obnoxiously so, Python was just waiting for me at every single step to say, “Hey, you need some help with that?”
Thinking About Things – RFID, Raspberry Pi, and IoT
Raspberry Pi is a company that makes multiple types of single-board computers. They stem anywhere from the size of a credit card to the size of a matchbox. The pinout and processors vary slightly but all of these can be used pretty much interchangeably. It’s very easy to hook up peripherals to it. For this project I use a Raspberry Pi 3 and the GPIO pins to connect my SunFounder RFID kit to the Pi.
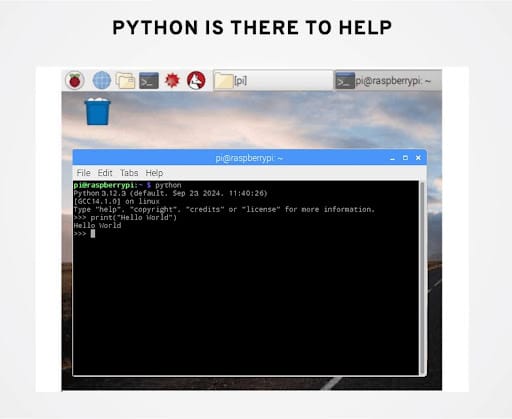
Immediately upon connection, we have our first glimpse of Python making things more approachable. As soon as you install Raspbian, you can launch a terminal, and the Python 535 shell (the version that comes with Raspbian) is already there waiting for you. If this sounds like a foreign language, start with the quick guide from Raspberry Pi and then come back here.
RFID in IoT
After Raspberry Pi and our first Python cameo, the next part of our IoT application – our “Thing” – is the RFID chip.
RFID stands for Radio Frequency Identification, and you can find it everywhere:
- The library checkout
- Your credit card’s tap to pay feature
- The access keycards you use to get into work or hotel
- The wristbands used at music festivals like Coachella & Bonaroo
RFID makes a great choice for IoT “Things” because of these three characteristics:
1. Power
For passive RFID, tags require absolutely no power when they’re in the radio field of the reader, which generates enough power to read and write data between the tag and the reader. (Active RFID has a much bigger range, but it does require that the tag itself has a battery, so it’s better for things like livestock tracking or other large-range applications.)
2. Data
Different types of RFID can store various amounts of data. The one I used stores 1 KB, plus its identification number. It’s not a lot of data, but it’s not nothing, and it works really well for my purposes.
3. Size
The RFIDs I used are the size of a sticker, so they’re really easy to put wherever you need them to go.
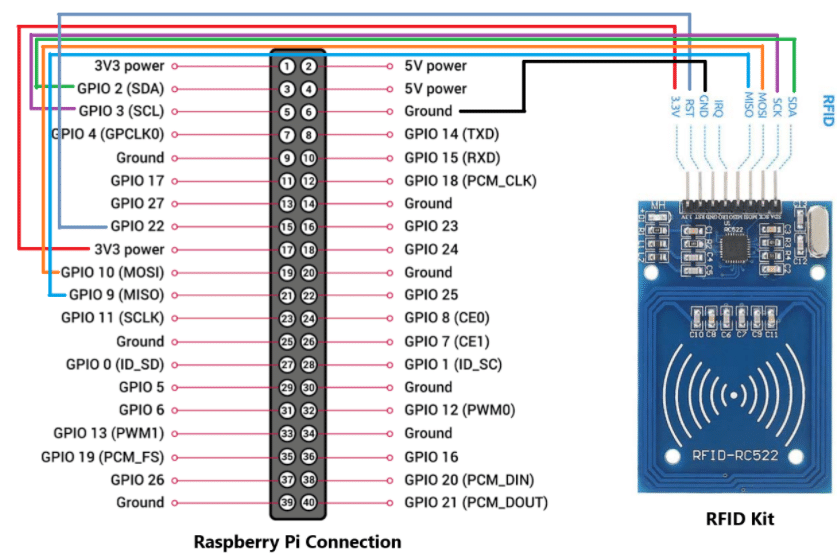
To hook up the RFID reader to the Pi, I followed this diagram to start connecting all the fun wires:
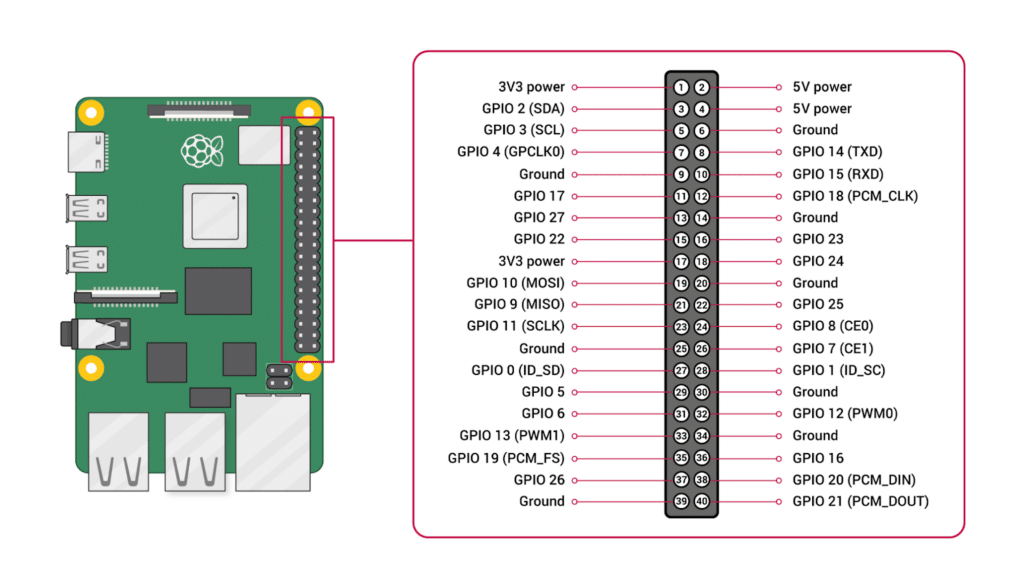
The RFID reader communicates over a protocol called SPI (serial peripheral interface) which is a GPIO-related task. SDO, (formerly known as MOSI as shown in the above diagram) stands for Serial-Data-Out. SDI, (formerly known as MISO as shown in the above diagram) stands for Serial-Data-In.
The Raspberry Pi is the primary device (since it has the microprocessor or “the brains”) and sends data out to the RFID device via the SDO/MOSI pin. The RFID device will then respond to the Pi over the SDI/MISO pin.
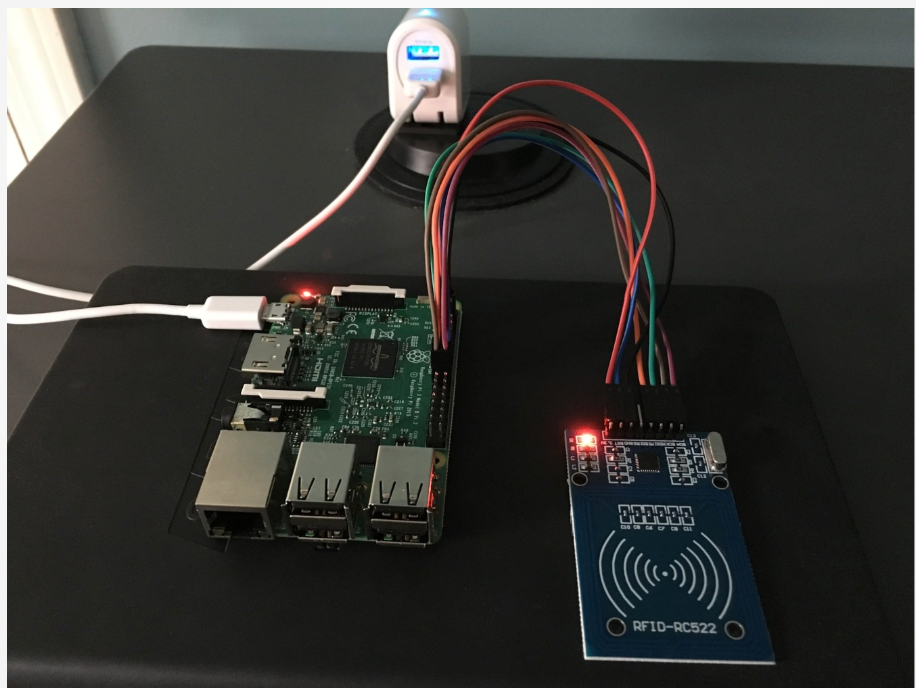
In reality, this is what it looks like:
At this point, it was tempting to say, “I’ve hooked up the interfaces. The RFID reader speaks over SPI, and Raspberry Pi speaks over SPI. We’re good to go, right?” Not so.
Enabling the SPI Interface with Python
There was one more step – I had to enable the SPI interface.
In frameworks like Nerves, these interfaces are on by default. However, since I was working with Raspbian I needed to set some flags and reboot the machine. Now that the machines could talk over SPI, the next step (in some language ecosystems) is to start shoving bits over the wire to registers.
The hard way to do this is to read the SPI and RFID reader specifications, including standards, data sheets, and registers.
The simple way, I found, is to use Python.
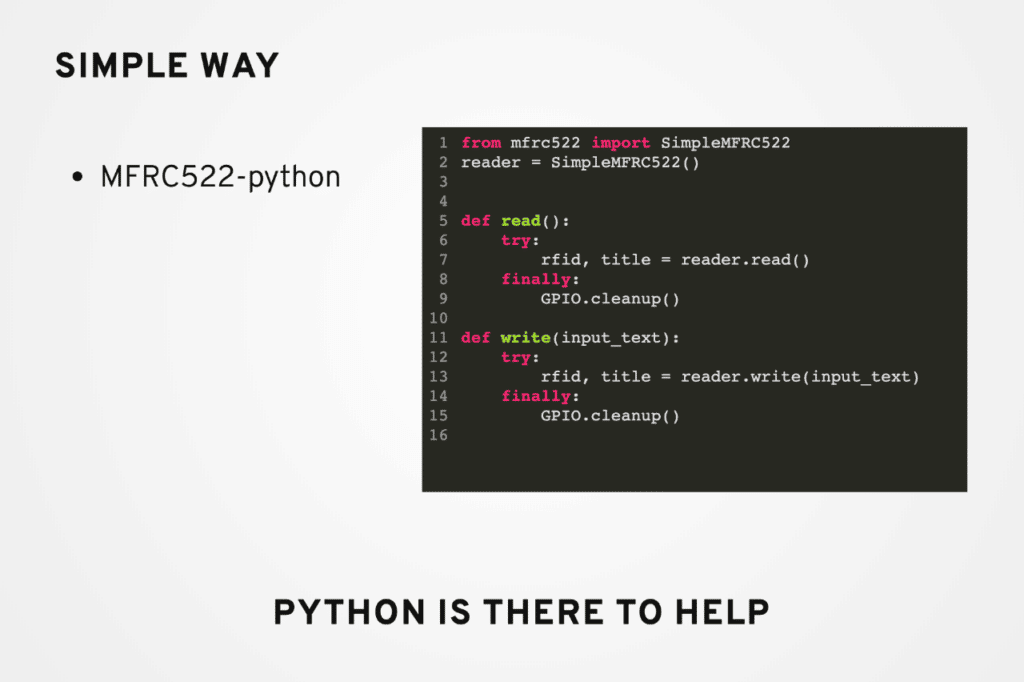
There’s a fantastic Python library that interfaces with my RFID card reader called MFRC522, which I could “Pip install”. With the RFID reader and the fantastic MFRC522-python library, I was able to read and write data to RFID stickers.
The Internet Level – Connecting to a Flask App
Now, I’ve reached the “Internet” level of my IoT project – the Flask app. I used Python to connect my RFID reader to the Flask app, and ended with a complete book lending application.
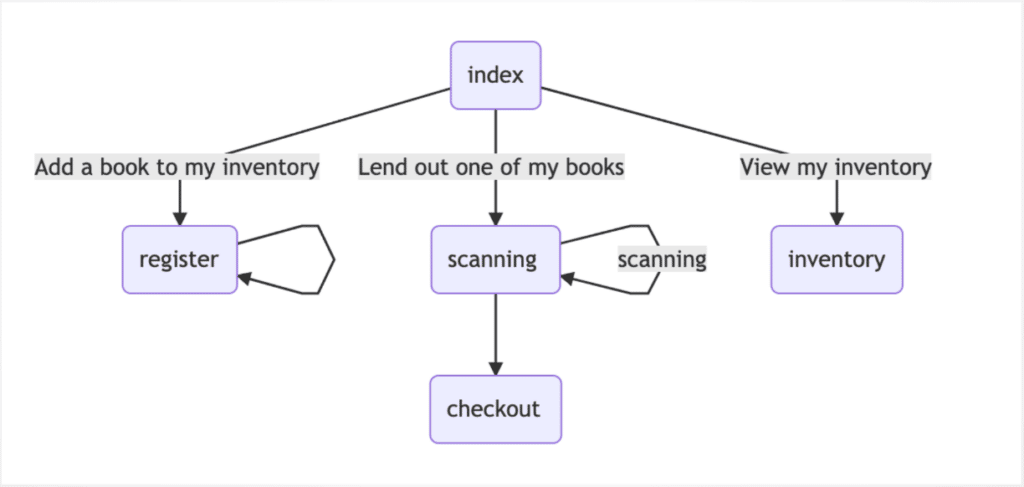
Above is my site map for the Flask app. I have a landing page with three links – to add new books to my inventory, to lend out one of my books, and to view my inventory. The first two pages are the ones that interact with the RFID reader.
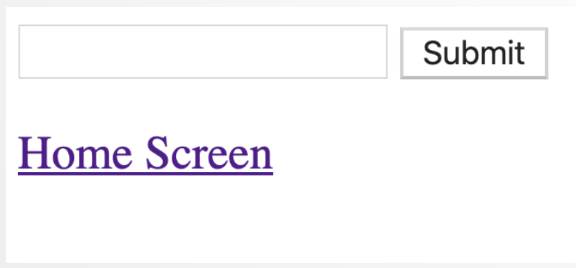
You can behold my artistic creation below, keeping in mind that this was an experiment and that I’m not a designer.

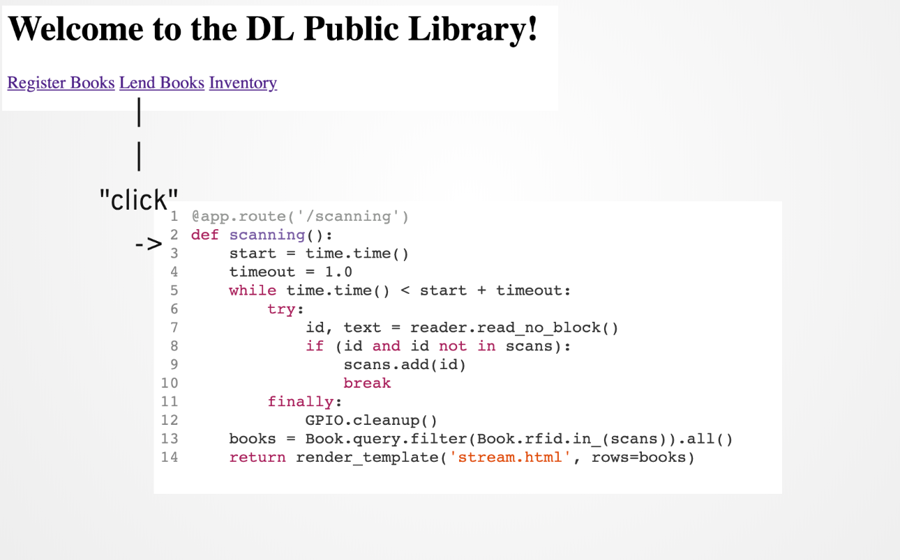
“Register Books” will allow me to type in the name of a book, click a button, and say, “Okay, this is the book that I want to register.” Then, it will save it into the SQL database.
To lend out a book, I can scan the RFID sticker on the book through the RFID reader, and the app updates the status of the book.
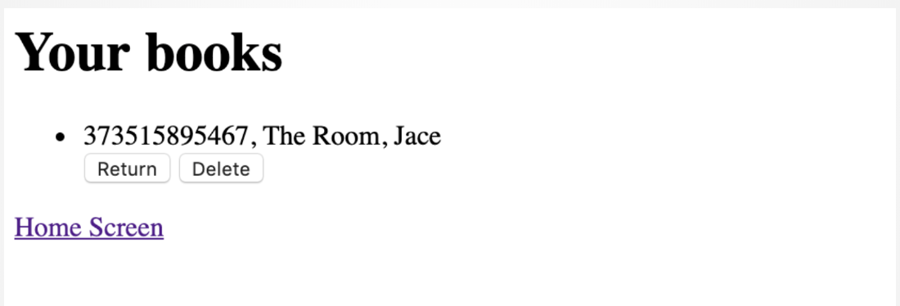
Finally, I have inventory, which simply displays all my books and their status. You can see here that I’ve lent The Room to my friend Jace.
One of the fun parts of any engineering project is finding and making tradeoffs. In this application I waffled between creating a separate service to wrap the RFID reader versus using three lines of JavaScript.
Fun fact, there’s a bug-turned-feature on the lend screen, did you find it?
You might not, but if you take a peek into what the RFID library is doing, you’ll find some pesky blocking ‘while’ loops. I found three lines of JavaScript a forgivable solution for the UX, even if I might not feel totally satisfied with the solution as an engineer.
And that’s it for my Raspberry Pi, Python, RFID, and Flask app project. I learned a lot about how Python could help me through the process, and I’m excited to work on more stuff like this in the future.
Thinking about building your own IoT application? The team at Very is here to help! Book a meeting, and let’s bring your project to life!